Friday, June 17, 2011
The Chappati Heartache
############################################
The Chappati Heartache
############################################
The soul of Indian food is composed of rotis. These complex carbohydrates form the staple food of a billion people worldwide. They are delicious to eat and highly nourishing for the body (proteins and fiber). So naturally, they are a delightful pain to make. The procedure is messy, time consuming, exhausting and at the end of it all, you are just glad there is something to eat! I would attribute getting consistent (good) chappati results over and over again to a stroke of pure luck. At every attempt at chappati making, you get closer to getting better. Which only means that you will never be perfect, just like an infinite series only promises to converge at infinity. Are you willing to wait till eternity to eat perfect chappatis made by you?
If you don't believe me, allow me to exemplify my theory with -- myself! I am your average girl next door, have been away from home for several years, eating copious amounts of rice and pasta during those years and close to being sick of rice and any form of beans. I greatly enjoy (and sorely miss) my mother's cooking. I have been trying to make chappatis for a while now but the art of chappati-making completely eludes me! Sure, every once in a while, I have the blessing to enjoy my own handmade steamy, puffy, soft, melt-in-my-mouth chappatis, but the sheer amount of times I have had to eat thick, hard, chewy chappatis just ruins the pleasure. It's like my chappatis are forever jinxed by a cosmic conspiracy. How else would you explain that in say, x number of times I have made chappatis, 10x! uniquely different things have gone wrong? Now, do I see some heads nodding in agreement? Haven't we all been there, ladies (and um... the real gentlemen)? Hence the chappati heartache -- consistency is the key in chappati making, but the lock is unfortunately password protected.
Don't get me wrong. I love the entire cooking process, but failure frustrates me. Repeated failure prompts me to write about it. It is my belief that cooking results directly indicate the mood and frustration level of the chef. I have noticed that if I am frustrated about something (other than cooking), my chappatis come out great. This I believe is because, frustration is good for the dough-making process, you have all the motivation to beat the crap out of it and the dough comes out soft and smooth. Ironically, if I am frustrated about how my chappatis are turning out, their quality just goes downhill from there.
For the benefit of the naive beginners and the entertainment of the (self-proclaimed) chappati experts, allow me to explain the nuances of the fine art of chappati-making. It is hoped that in spite of some not-so-subtle sarcastic (frustrated) statements, this will be considered a useful guide.
The chappati making process has 4 main steps:
Kneading the dough
Making small balls of the dough
Rolling out chappatis
Roasting the chappatis
It is difficult to judge which one of the above steps is the most idiot proof, because like I mentioned, I have goofed up every step of the way, and still discovering new goofs and mutations of old ones.
Step 1: Kneading the dough
This process is a little messy. Beginners, please remember to clip your nails and wash hands with soap and water! Use a nice broad mouthed vessel for this process, one that would have room for various violent arm movements.
Start with some atta (wheat flour) in the vessel, and add salt to it.
Then add 1 teaspoon of oil and rub into the mixture.
Now gradually add water, rub into the mixture. Continue adding water until the mixture looks like dry scrambled eggs.
Now sprinkle about a fistful (?) of water and combine into a single dough structure.
Knead and knead, till your knuckles give out, and your carpal tunneled wrists are permanently hanging at right angles to your arm.
Wash hands and cover and keep dough aside for at least 10 minutes.
Tips on kneading dough
Start making the dough when you are frustrated. Imagine the dough as the object of your frustration and vent it out. Start at the end of the long school/ workday for the ideal frustration level.
Salt is an important and easy-to-forget ingredient!
Keep in mind, the physics theories of relativity and the uncertainty principle.
Why? If you made nearly perfect dough today, measured the amount of ingredients with astronomical precision and the next day mixed up the exact astronomical amount to make the dough, the result will almost always never be perfect. According to my research, this is due to the fact that your experiments can be affected by the plethora of factors, your sense of measurement, instruments used, number of experimental trials, temperature, humidity, sweat level of the palms, magnitude and direction of the force vectors applied to the dough, quality of the mill that ground the flour, entropy of the atmosphere, pollen count etc., to name a few. In the big picture, all this boils down to the following factors: the speed of light, the speed of kneading relative to the speed of light, the orientation of the earth, its rotational speed and the resulting centripetal force and the gravitational pull of other celestial objects to name a few of them. That is how physics becomes involved. As you will soon realize, it is difficult for an uninformed mind to keep all these factors in mind. For a more detailed guide for this step, please refer to another guide that will be written after the completion of research: “No Two Dough Balls Are The Same – Why?”
Rare second chance opportunity, If dough turns out too dry/hard, try adding water and knead extra hard to incorporate in the dough.
If dough turns out too soft/sticky, You have messed up. You can try adding more dry flour and knead till you pass out, but I doubt if the situation is recoverable.
A word of confidence: Whatever the end doughy result is, try to continue with the following steps, because after all, you can always eat thick, ugly chappatis.
Step 2: Making balls from the dough
1. Break the dough into 'ping-pong size' balls, smooth, no cracks or gradations on the surface. Opinions vary among the chappati gurus, some say 'marble sized', some say 'lemon sized' and some others say 'small melon' sized. My short stint of experience seems to suggest that 1.45” would be more or less the precise diameter.
This sounds a little too easy but believe you me, if you mess up here this could jeopardize the next steps.
Step 3: Rolling out chappatis
Keep dry flour handy for dusting purposes (a little more if your dough is on the sticky side)
Take each ball from the previous step, flatten on the rolling board, apply flour and roll with the rolling pin. In the beginning, the rolling process would seem more like flattening. But this is a delicate process; one has got to respect the chappati.
Roll out into rounds of about 6-7 inches in diameter. And that's it!
Tips, Tricks and Strategies for rolling
You have to talk to the chappati, sometimes curse at it. Show who the boss is. At the same time, be gentle. Just like teaching a kid how to tie his/her shoelaces (except for the cursing part).
The trick is to roll such that the chappati rotates with your motions, so that it is even throughout.
A neat little trick that my mom once taught me: Once the chappatis are about 1 inch in diameter, roll with even pressure (not measurements again), trying to roll out the edges to prevent overworking the center.
If you worry too much about the shape, it will never come out round.
Remember that you cannot get the round shape by tricky rolling pin movements in the end. That is why step 2 is so important; you have to make the balls such that if you flatten it, it is a perfect round. Now rotate it and roll evenly to try and maintain that as far as possible.
Step 4: Roasting the chappati
Preheat the tawa/griddle.
Wait till small bubbles are formed and the surface facing the tawa has small brown spots.
Use a paper towel or clean kitchen cloth and apply pressure on the chappati to cook it from within.
Remove and apply ghee to the surface that has just left the tawa. As a wise man once said, “It is very important to realize that in the real world, everything has a right side and a wrong side.” Truer words have never been spoken.
If you followed all the above steps 100% correctly, there is about 50% probability that the chappati will puff up nicely. Tips and Tricks for roasting
Keep your eyes peeled at the chappatis; they love to burn.
When in doubt, turn the chappati over to check for doneness. If it is not done, flip it back. Defense is the best strategy you can use here.
Keep the flame on 'high' while cooking the chappatis. This is supposed to prevent them from becoming hard on cooling.
Now that the process is outlined, do you feel you are up to it yet? Here is the final twister that adds slight complications – multiplexing.
Yes, you are expected to perform the rolling, toasting and greasing processes in a parallel, pipelined fashion for optimum time and fuel efficiency. By the time you lovingly roll out the chappati at hand into a semi-circle with Australia on top, the one on the tawa has turned to coal and the ones piled up waiting to be greased have turned to stone.
As with most things in life, one should start with this adventure simple and add the multiplexing to give themselves a challenge along the way. Unfortunately, such people are considered lowly novices among the chappati elites.
I can almost see those chappati experts rolling their eyes saying, well, Rome wasn't built in a day! My answer to them would be, of course that makes sense, Romans were so preoccupied with making pizza dough that they procrastinated building Rome!
They say perseverance pays and practice makes perfect (or nearly perfect in this case). In the meantime, misery loves company, so I am sharing my whines and complaints. Then again, a new day will come and I will go through the process once more, and maybe one day I will be close to getting better at it. Remember, he who says he is perfect, lies. She, who says she is perfect, usually lies.
####################################################################
Monday, March 14, 2011
Spicy Granola aka Bhel Puri
- The tiny, round, puffy, crisp semolina puris that are stuffed with warm boiled potatoes and silky legumes, then filled with a cold, minty, spicy and tangy, green liquid. Once filled with the liquid you move really quickly and put the puri as a whole into a wide open mouth. As your teeth sink into it, there is a gush of warm meeting the cold. The crisp meeting the soft. The spicy and tangy meeting a very satisfied palate. A complete balanced meal if you asked me! This is called the Pani Puri -- and undoubtedly my favorite in the chaat family. One day, I will tell you more about the experience if you have never had the good fortune of enjoying this at an Indian street corner.
- Then there is the Pav bhaji. A spicy medley of vegetables - potatoes, cauliflower, green peppers etc, simmered in a tomato based sauce with a special blend of spices. This is served with a slab of butter melting on top with a side of pillows of soft bread rolls toasted slightly on a hot griddle. Here is a picture of a the street side chef cooking up a batch of Pav Bhaji, taken during a recent trip to Mumbai.
- Next, there is the Ragda Pattice. A layered dish of crisp potato cutlets, with a generous helping of spicy chickpea/white pigeon pea curry (similar your usual chana masala from the neighborhood Indian restaurant), topped with condiments such as spicy mint and tangy tamarind chutneys, chopped raw onions and crispy fried chickpea flour noodles. The aroma of the cutlets frying up on the extra large griddle is not easily resisted. Neither can you miss the metallic din of the stainless spatula used to flip and cook the Pattice or cutlet on the cast iron griddle the size of Texas.
- Vada Pavs are to Mumbai what Hot Dogs are to New York City. The original veggie burger, simply dressed in fresh out the frying pan warmth. A spicy mixture of mashed potatoes with onions, garlic and spices are formed to round balls. They are then dipped in a thick chick pea batter and fried to crispy goodness to form the vada. Then, the softest imaginable dinner rolls called Pav are split and slathered with a red chili garlic powder. The beloved vada is held between two halves of the Pav. The whole snack is only palm sized, and is devoured in only a few bites but packs a devastating punch in flavor. No need for any other fancy toppings, or dipping sauces, this is the on the go snack for the city that truly never sleeps. Just watching the efficient supply chain management of one of the vada pav vendors can easily form a case study lesson for business schools. Not Kidding!
- The most popular and easily portable snack among the masses is undoubtedly the bhel puri. You could think of it as the Indian trail mix. It is a mixture of churmura or puffed rice, sev or crispy fried noodles, papdi or flat fried chick pea disks and mungfalli or peanuts, roasted together with seasonings and spices. Just before serving, this is folded in with mint and tamarind chutneys, minced vegetables onions, tomatoes, boiled potatoes green chili (yes, ofcourse it counts as a vegetable!).
Bhel Puri Mix | |
2 tsps vegetable oil | Heat the oil in a pan. Add the mustard seeds, once they pop, add the remaining ingredients and fry for a 30 secs or so. |
2 cups Kashi 7 Grain Puffed cereal | Add the puffed cereal, peanuts and the pita chips and roast till the mixture is crispy |
Once cooled, store this mixture in a airtight container. Just snack as is or make into bhel puri.
Bhel Puri | |
1 cup of bhel mix | Toss together all the ingredients on the left! |
Thats it. A healthier, unorthodox way of enjoying Bhel Puri. Not the same as the street side counterpart, but a close nostalgic fusion.
Saturday, October 23, 2010
Potato of Color: Ratala Kees
1 tbsp oil | Heat oil in a heavy bottomed pan. When hot add the cumin seeds, curry leaves and dried red chilies. Cook for about 30 seconds. |
2 sweet potatoes, washed, peeled and coarsely grated | Add the sweet potato, salt and cayenne pepper. Mix well, and cover and cook for 4-5 mins till tender. |
| 2 tbsp crushed, roasted peanuts | Add the peanuts and combine well. |
1 tbsp lemon juice | Turn off the heat, combine lemon juice and top off with cilantro |
Wednesday, August 11, 2010
How to quit whining: Trader Joe's Masala Burgers
The first few weeks after a move to a different city can dampen your style. You have to learn the ways of your new home and navigate the new lifestyle. One of things that slowed me down since my latest move was finding things on my list at the grocery store. The aisles were arranged in a manner completely counter intuitive to me. Tofu was is in the meat section, sometimes in the diary aisle and sometimes in the produce aisle. None of the stores have quite the variety and novel items as Trader Joes.
We often grossly underestimate just how much we value something until we don’t have it anymore. My pantry misses the TJs vegetarian pasta sauces, rennet free cheeses, real fruit juices, granola bars and breakfast cereal. My soul and saliva glands miss the 'Vegetarian Masala Burgers’. These frozen patties made from real vegetables can debunk any veggie burger stereotype you may have.
After 6 months of moaning and complaining about non-exciting grocery shopping and tasteless burgers, I decided to take matters on my own hands and decided to quit whining. You see, to quit whining, you need to suck it up and find an alternative. I decided to recreate the flavors of the burger in my own home based on memory. One look at this recipe and I felt greater confidence that I could bring the TJ magic into my kitchen. What the burger needed was mealy potatoes mashed with lots of vegetables and some smoky Indian spices and herbs.
Vegetable Masala Burgers
4 large potatoes, boiled, peeled and grated Mash the vegetables together in a large mixing bowl 1 tbsp freshly ground coriander seeds Stir in the spices and incorporate completely into the potato vegetable mixture. Form into patties, you should get about 5 medium sized patties a few tbsps oil to fry Heat oil in a griddle and cook the patties about 4 mins on each side until brown 1 onion sliced In the same griddle, drop the onions and bell pepper and brown them till slightly tender. Burger buns Assemble the burger by squirting on some hot sauce on one side of a bun, place the cooked patty on it. Top it off with some browned onions and peppers and cover with the second bun. Open wide and stuff your face.
1 green poblano pepper, grated
2 ears of fresh corn, with the kernels grated
1 carrot grated
A handful of peas
Big generous handful of chopped coriander leaves
1 tbsp finely chopped green chilies
1 tsp red chili powder
2 tsp dry mango powder
Salt to taste
1 bell pepper sliced
Sriracha hot sauce (rooster sauce)
This burger is going to feature on my dinner table quite often. I still miss my TJs, and stock up on their merchandise at every available opportunity. Meanwhile, I will try to do a little less of whining and perhaps the occasional wining. But I won't promise anything.
Sunday, July 25, 2010
Stuff it, if you can: Tofu Stuffed Bell Peppers
| 2 tsp vegetable oil | Heat oil in a heavy pan and add the tofu. Allow it to brown about 7 mins. Check on it once or twice |
| 2 tsp veg oil | Heat oil in another pan, and fry the onions till soft. Add the chick pea flour and peanuts and cook till the raw smell of the flour is lost. Add the tomato paste and a splash of water to combine |
| 1 tsp dry mango powder | Add the spices and seasonings, stir to combine. Mix in the browned tofu into this pot. |
| 6 small peppers in assorted colors | Trim the bottoms of the peppers, cut of the top and remove the seeds. Stuff the peppers with prepared mixture till filled to the top. Bake for 15 minutes in a 400 deg F oven |
| Remaining stuffing | Add the stock to the remaining stuffing in the same pan and bring to boil. Add salt or adjust seasonings to taste. Add the chick pea flour slurry to thicken sauce. Get the peppers out of the oven, add to the saucepan let it soak in the sauce before plating. |
Sunday, July 18, 2010
Whats that smell?
The trouble is that Indian food smells extremely inviting when it is fresh and hot and oh so delicious. There have been many days in my years of apartment living when I felt instantly homesick having woken up to the smell of ‘khichdi’ or ‘paratha’ or ‘rasam’ from the kitchens of my many Indian neighbors, dispersing through the long carpet lined corridors in the building. That same night as I would return home, I would be instantly nauseated by the weakened, yet prominent elements of the same morning smells in the corridors. Like the smell of cooked basmati rice. Or cooked lentils. It is never the freshly ground spices you smell at this time long after the food has been cooked and perhaps even eaten. Those volatile pleasant odors just disperse into thin air. What you smell are the persistent remains of background ingredients that penetrate through everything. You skin, your clothes, your hair. No amount of perfume or cologne in the world can help you. The only solution is a nice long soak in the bath, good amount of scrubbing and some rinsing with scalding hot water. Lather, rinse, and then repeat. Do that for yourself then for your entire closet.
Now it is my personal belief that the smell is mainly due to the type of oil used and type of degeneration it goes through at the temperatures it is heated to. Olive oil can stink up a whole neighborhood if heated high enough to make a proper Indian ‘tadka’. You need a good heat friendly vegetable oil or sunflower oil for that. Even then there is a chance you will be walking around smelling like ‘dal’ depending tadka ingredients and how long you let them brown. About 65% of all Indian food calls for frying in hot oil – and invariably the oil gets beaten and battered at high temperatures and the aromas of the oil fumes just envelope and eventually overpower your natural scent.
So, am I saying avoid Indian food? No, absolutely not. The best thing you can do to your palate is to experience the flavors of Indian cuisine. Ask any Indian worth his/her dhoti/dupatta – they will tell you that when it comes to combating the strong, complex aromas of Indian cooking, prevention is better than cure. I assure that like my husband, there are many of them out there have tried to study the wind patterns in their poorly ventilated North American kitchens. Many a ‘gadgets’ have been invented to direct the air from the kitchen out through the closest windows. We used to have a dedicated fan near the kitchen that had to be turned on high speed and angled just right to sweep the cooking air out through the back door. This was in addition to a loud vacuum inducing exhaust over the stove. I no longer mind that the exhaust drowns the sound of the TV or music playing in the background.
Allow me to offer some wisdom on dampening the possible effects of Indian cooking on your home atmospheric air. Before entering the kitchen to begin prepping for cooking, be sure to close all other doors to all rooms in the house, including closet doors. Make sure you are not wearing your ‘going out’ clothes, because you are going to have to put everything you are wearing for wash as soon as the cooking is done. Put away any odor sensitive items such as blankets, sweaters, coats etc behind closed doors. Open up windows on two opposing walls if available, to induce some healthy cross ventilation in the kitchen and attached living areas. You want to leave the air only one place to go – out the open windows. Remember warm air rises like a cloud. So a cold breeze from a fan or AC vent near the heat source can greatly improve circulation. A good quality over-the-stove exhaust is absolutely essential – be sure it is on before your stove turns on. Proceed to enjoying the cooking process at your leisurely pace now. Keep the exhaust fan going for atleast 30 minutes after the cooking is done. With these precautions alone you can minimize damage area. Don’t wait too long before cleaning up the kitchen after all the cooking. Store your leftovers in airtight containers in the coolest part of your refrigerator (top shelf closest to the freezer). Now you may light up some fragrant candles or oils until you get your house back.
Say you forgot to take some of the precautionary measures and your house now smells like last night’s dinner. Allow me to impress upon you the fact that I told you so. But I will also offer some possible solutions. Close all the windows, and turn up the heat in your house to a level above the outside ambient temperature. I know you will get sweaty, but don’t be impatient. Now turn the heat off and open all doors and windows for about 15 minutes. The warmer inside air will escape out while you welcome the cooler fresher air in.
So while the popular stereotype about the exotic Indian food staying with you long after coming in contact with it may have some truth – hope by now I have helped you lose some of your fear of trying out the cuisine for yourself. As for the other myths and stereotypes like imaginary ingredients, namely ‘curry powder’, well, that’s a whole another topic for another day.
Wednesday, April 07, 2010
Think Pink: Beetroot Roti
Thursday, September 03, 2009
Chaat it up! Restaurant Review
We drove into Bramdesh, as the localites lovingly refer to Brampton -- and into this hidden jewel somewhere outside of town
Mirch Masala
8917 The Gore Rd,
Brampton, ON
We pulled into the sprawling strip mall aptly titled Jaipur Gore Mall, lined with Indian businesses -- a Hindu temple, a Hindu Montessori school, Subzi Mandi cash and carry, Chilli Szhezuan Indian Chinese restaurant etc. Snug n the middle was 'Mirch Masala' standing out with its bright yellow sign and the attractive posters boasting of the sheer variety in the menu. "21 Paratha varieties", "51 eggless cake flavors", "100 % Vegetarian". We walk in -- and we are the only ones there! Maybe we were the only chaat crazy ones on a late Sunday afternoon. Well -- no time is better for chaat than right now if anyone cared for my humble opinion.
On glance at the menu and you know you are out for a smogarsboard. Why can't you have yourself a Pani Puri, a Bhel Puri, Dahi Puri, Aaloo tiki chaat and Papdi chaat when you have it all for less than CAD 5.00 a piece? Once you are down with the light stuff, head over to the 11 different varieties of vegetarian burgers. Are you reading this McDonalds? Now that is what I call a happy meal. Try a 'samosa'wich burger -- a burger packed with samosa pieces and spicy chickpea curry, topped with onion, tomato and lettuce. Add chilies to your burger, kick back your shoes and sink in. Samosa does not fancy you today? No problem, try a Indian curry burger or a Bollywood burger or a Greek Burger. Make it a combo and add Masala fries and a soda.
Ok, you really wanted to go to Brars but your chaat crazy wife guilted you into coming to Mirch Masala? Don't worry, you will not be missing out on anything. Have a Paneer Tikka platter - includes grilled paneer tikka, with grilled peppers, tomatoes and onions. With a side of chickpea curry, butter nan and rice for CAD 8.99.
And end the meal with hot gulab jamuns. Wash it all off with a fresh lime soda or masala chai.
Sriracha hot sauce flows free as the Niagara Falls. Goodbye bland food!
Next time you are in the area, stop by at Mirch Masala and enjoy a quick meal. The menu is sure to please all kinds of taste buds. If any locals are reading this -- please enlighten me -- why wasn't the place swarming with people, a place like this deserves dedicated patronage :) Is there a better chaat place I should try?
Tuesday, August 11, 2009
Dinner Dance
You may graduate from college in four years, but graduating from the college lifestyle can take longer. I have trouble getting up for those early meetings. I am forever running 10 minutes late for everything. Dinner is something I get in the stomach, not necessarily on the table. While I am growing out of these habits slowly and steadily, there are crazy days that I absolutely need to conjure dinner in less than 10 minutes. Most often this is because I am absolutely dying of hunger at the end of the day. I call this my weekday dinner dance. Today being an exemplary day of swooning to the rumblings beats of hunger, I turned the stove on, rummaged for my favorite pan, drizzled a few drops of oil it and placed the pan on the stove. Then I tapped off my shoes and washed my hands. From the freezer, I picked out some veggies – chopped mixed peppers, broccoli or cauliflower, threw in a handful of them in the hot pan added some seasoning. As the veggies rocked and rolled on the stove, I morphed into my pyjamas and washed up. I ran a knife through whatever combination of fresh aromatics I had on hand – onions, garlic, cilantro, and chili peppers and dropped them into the party. Thinly sliced tofu and aimed them into to the pan with seasonings of salt and pepper. The tofu and vegetables browned as I checked out the day’s mail and separated the bills from the junk. Two huge fistfuls of dry thin rice noodles went to the pan, with a cup of water. Now I did some on the spot walking as I patiently let the noodles cook up and the water get absorbed or evaporated. Noodles were transferred to a plastic container and eaten right out of the container. The leftovers were left over in the same container for the next meal which may be the next day’s lunch.
Such is the joy of cooking that satisfies your basic human needs.
Wednesday, August 05, 2009
Granola bars - bhel puri ishtyle
And I like crunchy cereal and granola bars. My only peeve is that most American breakfast foods (whatever is vegetarian-izable) is laden with sugar and cannot be enjoyed if you have a spice tooth. Why do granola bars have to be based on honey and sugar syrups. The three primary seasonings in our culinary world are salt, pepper and chili powder – why can’t we have a granola bar or a health bar that actually uses one of them? I decided to break the trends and create the spicy granola bar. The ultimate go-to snack chaat bar. I would base it off the classic Indian street food – bhel puri.
The main challenge involved in steering the sweetness out of the bar – find a sticky substance powerful enough to bind the ingredients together and not fall apart. Bhel puri is like a salad or crumbly granola of sorts made of puffed rice, fried dough chips (papdi – vernacularly translated), chopped onions, tomatoes, spices with a dressing of tangy, sweet, spicy chutneys. Now puffed rice would readily get soggy at the first hint of moisture and that would make for bhel that tastes like cotton. And making the bhel-puri bar healthy would not be a bad idea.
So off I went to the neighborhood Whole foods and spent a leisurely evening of food label reading. I came back with the following
Crispy Brown Rice Cereal (substitute for the rice puffs)
Old fashioned rolled oats (it is a granola bar of course)
Sliced almonds (initial thought was peanuts, but figured almonds are healthier)
Baked pita chips (substitute for the papdis)
Dates (sticky substance + sweet taste)
Tamarind paste (sticky substance + sour taste)
Mixed dry fruit – cranberries and apricots
My game plan was this – just like a traditional granola bar, I would toast the oats and nuts while I create the binding sticky substance. I contemplated using molasses as the sticky agent. But that would be sweet all over again. I decided on using egg replacer as a thickening agent and if ever it shows properties similar to the egg, when baked it should coagulate and bind its neighboring particles together. If all else fails, I may not end up with a bar – it may just be a crunchy granola mixture. But, it shall be spicy and it shall be healthy.
1 cup sliced almonds 1.5 cups old fashioned rolled oats | Spread on a cookie sheet and toast in the oven at 300F for 10 mins. Allow to cool |
2 cups brown rice crisps cereal 1 cup baked pita chips broken into bits | Mix together with the toasted ingredients and set aside |
2 tbspoon tamarind paste 5 dates (pitted) A handful of coriander leaves A few curry leaves Salt (about half tsp) Any hot sauce (for desired spice level) .5 tsp Cumin seeds | Using as little water as possible blend into a nice sticky paste. |
2.5 tsp Ener-G egg replacer 1 tbspoon water | Dissolve the egg replacer with water and combine into the sticky paste. Now in a convenient mixing bowl combine your dry ingredients with the sticky ingredients Grease a baking dish slightly and transfer your mixed granola. Press down firmly to allow all ingredients to acquire stickage. Bake at 300F for 10 minutes or till nice and crunchy Allow to cool overnight and then cut into bars. |
I still need to let the bars cool overnight. I may not have achieved the desired level of stickiness – but the bars are still quite warm to touch. I did hazard a taste and not bad ladies and gents, it may be a worthwhile experiment. I forgot to include the dried fruit in the bars – but I can eat those while I wait for the bars to cool.
Whats the verdict? not bad for experiment #1. I still have not dropped the idea completely.
If folks out there want to try making the traditional granola bars, look know further than the Alton Brown recipe.
Saturday, March 08, 2008
Southwest Scrambled Tofu
Being the unabashed tofu fan that I am, most weekend brunches involve tofu put together with the contents of the fridge - different veggies: peppers, spinach, accompaniments: ketchup, soy cheese and warm toasted bread. Here is a Tex-mex variation of tofu scramble with chipotle chillis. These are smoked jalapeno peppers that come in a jar all soaked in Mexican Adobo sauce. The Adobo seasonings include garlic, tomato paste and onion. So, thats all you need for the flavorings. When I run out of the usual green chilis I used for daily fare, I substitute these chipotle chilis.
Here is how I went about making the Southwest Scrambled Tofu. Use firm or extra firm tofu, cut off desired amount from the block, slice thin and squeeze out excess liquid from the tofu crumbling it in the process.
| Southwest Tofu Scramble | |
| 1 tsp peanut oil 1 cup crumbled tofu (liquid squeezed out) 2 chipotle chilis (or less for a milder flavor), chopped 1 tsp of adobo sauce from chipotle chili jar .25 tsp turmerica pinch of salt (or more to taste) | Heat the oil in a pan (omlette pan works well). Add the tofu, chili, turmeric and the sauce. Add salt if necessary - the Adobo sauce is seasoned. Cook for 2-3 minutes till tofu is dry and resembles scrambled eggs |
| 2 tbsp cooked black beans | Add the black beans to the tofu, heat through. Serve with heartly whole wheat bread |
Add a glass of freshly squeezed orange-grapefruit juice, and you have given your metabolism an early morning boost!
On most weekdays I do the cereal routine. If you are like me and flee at the mention of milk, try adding cereal or granola to some greek styled yogurt. Greek yogurt is strained thick yogurt that comes low fat and is readily available in most regular well stocked supermarkets! I like Kashi's Go Lean Crunch cereal. It is delicious and each 1 cup serving has 9 gms of protein, 8g fiber and Omega 3 fatty acids.
This balanced breakfast is my entry to this month's Weekend Breakfast Blogging (WBB), concieved by Nandita of Saffron Trail, hosted this month by Mansi. Thanks for choosing the theme of 'balanced breakfast meals'!
Tuesday, July 31, 2007
Doodh Peda (Milk Fudge) : 6 Minute Guilty Pleasure
But all good things in life are difficult to come by. Agree? Traditionally to make pedas you must painstakingly boil the milk for hours *without* burning it. However, with the magic of processed foods and invention of appliances for busy people you can enjoy pedas in not 9 minutes, not even 8 minutes, but just 7 minutes and 59 seconds. However, if you were to follow the recipe properly you can cut 2 full minutes of prep time. Hopefully I have made you googly eyed just like those attractive infomercials on TV this time of year :-)
All you need for this recipe is a nice big microwave safe glass bowl (with a wide mouth), a can of sweetened condensed milk, a stick of butter and 1/2 cup of non fat dry milk. I don't regularly endorse brands, but Carnation brand dry milk works best - other brands I have tried have given less than optimal results.
| Doodh Peda | |
| 1 stick or 1/2 cup unsalted butter | Place butter in a large glass bowl and microwave for 30 seconds or more so as to melt it. |
| one 14 ounce can of sweetened condensed milk 1-1/2 cup of non-fat dry milk | Mix in the condensed milk and dry milk powder and microwave for a minute. Stir vigorously to combine. Repeat the microwaving for a minute and stirring 4-5 times until the texture and color of the mixture resembles cooked oatmeal. |
| 2-3 cardamom pods a healthy pinch of saffron | Grind the black seeds inside the cardamom pods and the saffron into a powder and mix in with the peda mixture. Let the mixture cool until it can be handled by hand. Shaped into small balls and flatten to form pedas. Alternatively spread on a greased sheet and cut into shapes when cooled completely. Decorate with slivered almond or pistachios |
Only seriously insanely obsessive picky eaters will be able to tell you have not slaved over the stove for hours. For the rest of us - this tastes as authentic as it gets. There are many variations to this basic peda recipe - but this one has turned out perfectly multiple times and is what I call a keeper recipe. Thanks to my dear cousin who made these pedas specially on my birthday!
Tuesday, June 26, 2007
All in one solitary meal: Tofu Spinach Roti
But, today I was possessed with the will to cook something good. I was surveying the pantry when it came to me - the mother of all one dish meals - the paratha (Indian flat bread). I gathered all elements of the USDA food pyramid - whole wheat flour, tofu, frozen spinach, vegetable stock cube, water and oil. And got to work. Also, in my life when it rains, it pours. So in true overachiever behaviorial pattern, I also launched another unit of processing - laundry. I kneaded the dough for the parathas and put the clothes in the washer as the dough rested. The whole cooking, cleaning and eating process was done before the end of the dryer cycle. Of course, I was eating as I was cooking. Here goes the recipe for the parathas/rotis
| Tofu Spinach Roti/Paratha | |
| 0.5 cups frozen spinach 1/2 a vegetable stock cube | Place spinach and half a stock cube in a microwave safe bowl (big enough to knead the dough in) and nuke for 1 min to defrost the spinach |
| 1.5 cups whole wheat flour 2-3 tbsp crumbled tofu (no need to drain) 1 tsp chili pow Not more than 1/2 cup water | Add the flour, tofu and chili pow (and salt if needed, the stock cube will have seasonings). Use your hands to incorporate all the ingredients. Add water little by little and knead into a smooth dough. Keep aside for a few minutes if you can spare. |
| Divide dough into 10 parts, Roll into balls and flatten to form discs. Using a rolling pin, roll out into discs of about 6in diameter. Shape has no effect on the taste and nutrition. Heat a griddle/shallow frying pan till hot. Slap on a rolled out disc, flip after cooking ~30 sec on each side. Now drizzle some oil if desired and toast both sides applying slight pressure till brown spots appear on both sides. |
Eat by itself or with plain yogurt. A proper meal, two loads of laundry and a blog post all in one week night - tonight is going to be hard to beat. If only I can now muster up motivation to put away that laundry!
Monday, May 07, 2007
Peanut Coconut Curry Sauce - So easy even the Geico Caveman can do it
I came across a recipe for a Simple Coconut based peanut sauce (vegetarian-ized version of Sandra Lee's recipe) - once all the ingredients are at hand, it took less than 10 mins to put together. Reminded me of PF Chang's Coconut Curry sauce - one of my favorites. My kind of a meal - definitely one that would please many others. And I hereby confer on this recipe the Geico Caveman approval seal. Here is the recipe that will comfortably serve 2 as the main meal with rice
| Vegetables in Peanut Coconut Curry Sauce | |
| 1/2 block of tofu cut into cubes (of desired size) 1 tbsp oil a splash of soy sauce | Heat oil in a pan. When oil is HOT, add the cubes of tofu and pan fry till a nice brown crust is formed. Add a splash of soy sauce and allow the tofu to absorb the liquid. |
| 2 cups of chopped vegetables of your choice (green beans, peppers, broccoli, snap peas etc) salt to taste | Add veggies and salt to the pan, cook till vegetables are tender crisp. Around 3-5 minutes |
| 1 12 oz can light coconut milk 1/2 cup vegetable broth 1/3 cup crunchy peanut butter 2 tbsp brown sugar 1 tbsp red chili paste 1 tsp tamarind extract (or a few bits of tamarind soaked in the stock) | Whisk together ingredients on the left into a smooth sauce. Add to the pan of simmering veggies. Taste for salt since the broth/peanut butter are seasoned. Simmer and let sauce thicken for about 6-8 minutes. Garnish with chopped coriander leaves. Serve with steamed brown or white rice |
Sunday, May 06, 2007
Change is good And Healthful modifications
Change is inevitable - except from a vending machine
I read that quote on an email signature and laughed out aloud. If the last time I had updated this blog some one had told me how much my life would change in just one year - I wouldn't have believed them. Life today has taken unbelievable twists leaving the future murky and uncertain. We don't know whats in store for us but at least we have the option of making it what we want it to be. Change is good. Change is good, indeed. Change is certainly difficult to get accustomed to. But here we are facing refreshingly new challenges, cleaning out the cobwebs in our heads - change is good indeed.
So, to take my mind off how different things are, I decided to come back here to my familiar spot in the blog world. Thanks to the people who have cared to ask how I am doing. The last year has been one enjoyable roller-coaster ride - failures and successes. Finally, both hubby and I are pursuing what we have wanted to. In the midst of all that action - this blog has suffered my lack of attention. But I am back at least for now.
The last I mentioned here was a wonderful book that I had come to own - a book on healthy eating. Sorry for the lack of pictures, but I really wanted to get one recipe that I have made time and again out on this blog - Cracked Wheat Idli
If you like Rava idli (steamed dumplings made of semolina flour), you can make a simple modification of substituting some or all of the Rava with cracked wheat for an equally delicious, yet more nutritious idli.
| Cracked Wheat Idli | |
| 1 cup cracked wheat (fine) | Dry roast in a pan the raw flour smell is gone (just before it turns brown) |
| 1 cup yogurt salt to taste water to dilute | To the roasted wheat add yogurt and salt. Mix to combine. Add water (tablespoons at a time) to make the dough into a pouring consistency of idli batter. Not more than 1/2 cup water. Allow this mixture to rest for at least 15 minutes |
| 1/4 cup grated carrot 2 tbsp grated coconut 1 in piece of ginger grated 1 tbsp finely chopped coriander | Add grated carrots, ginger, coriander and coconut to the mixture. Pour ladle-fulls of the mixture into idli moulds and steam cook for 15 minutes. Serve with coconut chutney. |
You can add any vegetable to this idli just be careful about the water content. For instance if you are going to add grated bottle gourd, cut down on the water in the recipe accordingly. Need to settle down into my blog yet again. So much has changed here as well. Need to find out whats new with the Google blogger. Until then, it feels GREAT to be back!
Tuesday, August 01, 2006
What I have learnt from MIL
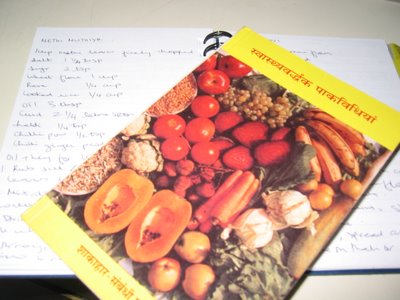
MIL too is an ardent cook ... she loves to cook not just for herself, but for sharing with everyone. And I have mentioned elsewhere in this blog that she enjoys food discussion and description! So, needless to say, I got to learn a lot many new recipes with her around. Infact she brought with her a cookbook in Hindi which I greedily grabbed. It has been such a long time (10 years to be specific) since I have properly read any form of Hindi. I used to be prolific reader of the language during my school days. Now, I will get a chance to rebuild my Hindi skills along with healthy cooking ideas. The book is titled (Translated for every one's benefit) - Health Reviving Dishes - Vegetarian Related. I also have a fresh supply of family recipes, which ofcourse I will try to share with you all in due course :)
Some other important cooking lessons that MIL has imparted on me
- Reduce Wastage - This one is a biggie. In my daily rush to get done with dinner, I usually throw in what I find in the fridge. No proper planning into whats been there for how long or how leftovers can be used. With MIL here for these past months, I just cannot remember throwing out any edible item just because it went bad before it could be used. She had a plan of what to do with a vegetable or produce item when we bought it at the store. Also left overs were planned for accordingly. For example, today's leftover dal or cooked rice would be made into muthiya's for the next day's breakfast. Wastage also was not only in food items - I tend to be prolific in my use of plastic ziploc bags, paper towels etc. Since my habit is an easier and quicker option, it might be difficult to change. But I will certainly be concious about other alternatives before I lunge to grab another bag or paper towel :)
- Importance of Breakfast - This is something I knew all along... that a good breakfast is a great start to the day. But, somehow never incorporated it in my lifestyle. Cooking up a hot breakfast means adding planning time, cooking time and extra washing time to the morning drill. So, I have usually avoided it in the past. When MIL was here, she would make it a point that we didn't leave without a hearty breakfast. She would make us hot jowar/bajra rotis. Just one at 8 in the morning would fill me up good until 12 or 1 in the afternoon. We have gone back to our cold cereal routine for now, but maybe I can practice speed-breakfast skills on weekends.