Monday, February 27, 2006

How Far Can I Push The Pantry (HFCIPTP) # 3: Pasta sauce

Here is another in the series of using up stuff in my pantry to whip up balanced meals. A few thoughtful opening and closing of pantry and refrigerator doors later, I had my mind made up. It was going to be pasta that day with ready made sauce. Then as I put the pot of water on the stove and waited for it to boil, I remembered Indira's recipe of pasta sauce which used peanuts. That got my mind scheming on how I can adapt that recipe to my limited pantry. After a few seconds, the answer seemed obvious.

This is why I love blogging and blog hopping. I find myself spending less and less time pondering about whats for dinner. Thank to all fellow food bloggers for sharing the seemingly mundane details of what you had for dinner/lunch!

On to the sauce... lets give it a name "Roasted Pepper sauce with peanuts and soy burgers". I don't have a picture of this yet, but it was delicious (for now you have to just take my word for it)! Will update with the pic soon.
Roasted Pepper sauce with peanuts and soy
2 cups roughly chopped bell peppers
1/2 cup roasted peanuts
1 frozen veggie burger, thawed and chopped
2 tsp olive oil
Heat oil in a skillet, add the chopped peppers and roast well untill browned. You may also use onions in this step if you have some in your pantry. Add roasted peanuts and chopped burger and cook till the the burger is slightly browned as well. Cool and process in a blender to desired smoothness/chunkiness.
2 cups Ragu pasta sauce (Optionally, use canned or fresh tomatoes)
2 tsp sugar
grated parmesan/romano cheese to taste
Return the blended pepper mixture to the skillet and add the tomato sauce and sugar. Stir until heated though.Serve over cooked pasta,topped with grated cheese and crushed pepper.

The sauce was ready with the pasta and tasted great for a last minute meal.

Tuesday, February 21, 2006

And the award for the Most Misleading Product Name goes to...

This being Oscar season and all, I thought I would hand out of couple of awards of my own. First up, is the category of the Most Misleading Product Name. A clear winner in this category is the Post Grape Nuts cereal. The ingredients do not contain any grapes or nuts! Apparently this cereal was christened after its inventor Charles William Post, who reasoned that grape sugar is formed in the baking process of this cereal and that it has a nutty flavor! Talk about misleading... they should put that info on the box , like a statutory warning :-D. But it is supposed to be an excellent source of whole grain and therefore heart healthy.

I bought it at our local Costco some time back, simply because we were mostly tired of the other brands and cereal types. We try to stick to 'low' sugar cereals as much as our morning taste buds will allow. Grape nuts looked interesting, so we adventurously bought a wholesale sized carton. Showing incredible courage and will to eat healthy, we poured cereal and milk into our bowls. The first spoonful tasted like gravel and it only got worse from there on. We immediately gave it a more fitting name ... 'Hindi: Ghode Ka Chaara', translation Horse/Cattle feed. Hubbie promptly stopped eating it when he couldn't take it anymore and handed his bowl to me, saying he would pick up something for breakfast on his way to work. The next morning, we both got up with the same gloomy thought... 'Oh no, we forgot to pick up some cereal last night'!

We are still left with oodles of the un-Grape-Nuts, which we mix with other taste friendly cereals to decrease the impact of the healthy pebbles. And once again, we resolve to first try out new things in small quantities before buying bulkloads of them.

Monday, February 20, 2006

ARF/5-a-Day#8 and HFCIPTP #2

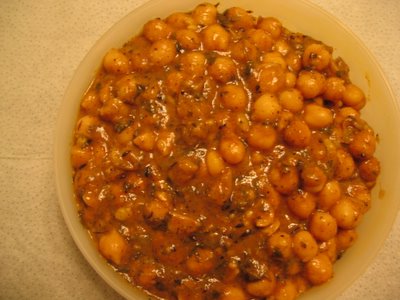
Another week gone by and it's Sweetnicks' ARF/5-a-day Tuesday again! This event has truly changed the way I approach my Monday night dinners :-) I did not need to be extra creative to accomplish ARF meals on my stock-limited pantry. I had plenty of canned chick peas which formed the basis of my 'Methi Kabuli Channa (Chick peas with fenugreek leaves). Here's a great picture of methi leaves by Indira. Today's recipe is adapted from Hemant Trivedi's, specifically I substituted dried kasuri methi (dried fenugreek leaves) for fresh ones. This is a Rajasthani (a desert in India) recipe, which is cooked without onions, garlic and other vegetables since they were hard to come by in the desert climate. Still, this is one of the best chick pea recipes I have tried, and I will definitely be making it again (with fresh leaves!)

Chick peas are a great source of protien, and contain a substance called saponin, which can act as antioxidants. Here is the recipe for "Fenugreek Chick Peas"

Fenugreek Chickpeas
1 tbsp Ghee (Clarified butter) or oil
1/2 tsp fenugreek seeds
1 tsp cumin seeds
4-5 cloves
1/2 inch sticks cinnamon
1/2 tsp asafetida
3/4 tsp mustard seeds
Heat oil in a saute pan/sauce pan and add the seeds. Allow seeds to sputter.
2 green chilies, chopped finely
3.5 tablespoons kasuri methi
Add and allow to sear very briefly until fragrance exudes
3/4 tsp cumin powder
1/2 tsp garam masala powder
1 tsp asafetida
1/4 tsp turmeric powder
salt to taste
2 tbsp tomato paste
Add to the 'tadka' and stir
2- 14oz cans of chick peas drained and rinsed
1 cup of water
Amchur (dry mango pow) or tamarind paste, to taste for desired sourness
Add and allow to simmer. Crush a few chick peas to thicken the gravy/sauce
1 tsp besan (chickpea flour)
2-3 tbsp cold water
Mix flour and water to form a thick paste. Add to the chick peas and allow to simmer for 5-7 minutes

Serve hot with warm chappatis or a bed of steaming rice.

Tuesday, February 14, 2006

HFCIPTP #1: Veggie Pizza Indian Style

How Far Can I Push The Pantry... This is the question I have been asking myself. It has been almost four weeks since a visit to the grocery store. Most of the perishable items I have are mostly wholesale items purchased at the local Costco (carrots, peppers). We were planning of going shopping over the weekend, but the Nor'easter came gatecrashing into the east coast. We got plenty of the white stuff and sat at home with friends, sipping Leo coffee.

Picture taken by Hubbie after about 15 in of snow had fallen

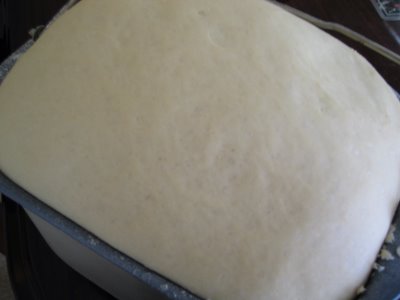
I am prepared for this pantry stretching challenge, and to start off, I made (streched :) ) some pizza. I used a breadmaker to prepare the pizza dough. But it is really easy to make it by hand too. Here's a recipe from Priya. Be sure you have active dry yeast and some all purpose/whole wheat/bread flour in your pantry. My pizza dough from the breadmaker rose bountifully.


Pizza Dough - risen and all ready to roll

Like I said - no melting cheeses (I had a small amount of processed Amul cheese from the Indian store), no tomatoes for the sauce... just some peppers, chilies, my last onion and some garlic. Here is an Indian take on pizza. I think Hubbie and I like this better than regular cheesy pizzas.


Indian Style Veggie Pizza
1 recipe for 10-in pizza crust doughRoll out dough into a 10 in crust on a pizza tray. As far as possible try to strech by hand. It doesn't make the crust too dense, plus its fun!
5 tbsps spicy tomato ketchup (I used the Indian brand Maggi)
3 tbsps Garlic Chutney (Nupur's recipe, made ahead)
Spread ketchup on the crust and sprinkle generously with the chutney
1 onion, sliced into half-moons
2 garlic cloves, sliced
1 cup assorted colored peppers, sliced
2 chilies chopped fine
some chopped chunks of Amul cheese (optional)
Top the crust evenly with the toppings. Bake in a 425F oven till crust is light brown. Remove from oven, cut into slices and serve. Top with crushed red pepper flakes.

I think I am now going to turn to Rajasthani or Jain dishes in the Indian cuisine, which do not use onions, garlic, tomatoes etc.

ARF/5-a-day-Tuesday #7: Green Tea

It's Sweetnick's ARF/5-a-day time again! And, one the home front, this is our fourth week running without a trip to the grocery store. We are out of most fresh produce except for some sweet red and yellow peppers and a couple of potatoes. Now's the time test just how well stocked my pantry really is. I have a decent stock of flours, dals/lentils, frozen peas and corn, canned beans and tomato paste. Without further ado, I declare this week, HFCIPTP week aka How Far Can I Push The Pantry week.
This reminds me of an episode of Seinfeld, where Kramer and Newman are test driving a car with the fuel indicator dangerously pointing at empty. After several tense hours, they get to their exit, but in a Thelma Louise moment, they dare to ask, "just how far do you think we can go? " And they continue on the freeway not sure how long they would last :) Lets see if I can last till this weekend... with different types of balanced meals everyday, without testing Hubbie's patience and understanding tolerance :)

We usually jump start our mornings with a hot cup of masala chai (tea). Unfortunately this morning when I woke up and got to the kitchen to start up a batch of tea, I was taken aback to find that we had run out of Indian Tea. Drat, I added tea to the looong grocery shopping list hanging on the refrigerator door. Then my eyes fell upon the Green Tea (I have lost track of how long I've had it). My eyes lit up (like they do so often these days) - Green Tea! This would make a great ARF entry :) I used tea bags, but for best results, use tea leaves.

Green TeaServes 2
2 cups of filtered cold water
2 teaspoons green tea (or 2 teabags)
Bring water to a boil. Take it off the heat. Add the tea (or bags) and cover. Let it brew for 2-3 minutes. Not more or it will become bitter.
2 teaspoons sugar (optional)
touch of milk to taste (optional)
Add one teaspoon of sugar and a touch of milk into two teacups. Microwave for 30 seconds to warm up the milk. If not using milk or sugar, warm the cups by filling them with hot water. When ready to serve it, empty the water from cups.
Strain or pour tea into the prepared cups and enjoy!


Green tea is said to have potent antioxidants (25 times the amount found in most fruits and vegetables) that have been shown to be extremely beneficial, among many others, believed to lower cholesterol and prevent cancer.

Welcome back Sweetnicks!

Tuesday, February 07, 2006

Faux Kheema Mattar (Faux Minced-meat with Peas)

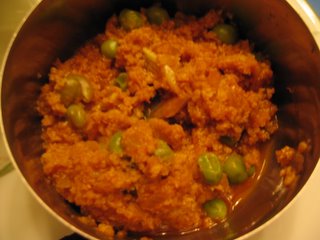
When I saw a recipe for this faux kheema on Bilbocancook's Smorgasbord, I mentally bookmarked it. Who wouldn't want to stretch their grocery visits, stock up on non-perishable items like soya nuggets and frozen peas? There will come a time in any home cook's life, when all they'd have in their pantry in terms of vegetables are some onions. Times like these don't think any further, pull out the stash of nuggets, peas, a can of tomato paste and whip up a quickie vegitarian kheema. Thanks bilbo, now I have one more thing I can make from Soy Nuggets. I am not sure what the shelf life of tofu is, but these nuggets will last a looong time.

Soya nuggets can be used in any gravied curry or pilaf recipes. Before adding to the dish, soak in warm water (salt the water if the nuggets are added at the end of the recipe) for 5 minutes, drain and squeeze out all moisture from nuggets. Use as desired in stir fries and curries.


Faux Kheema Muttar
1 cup soya nuggetsSoak in hot water to cover for 5 minutes. Microwave for 2-3 minute intervals until cooked. Drain, run under cold water and squeeze out excess moisture. Process in a food processor until well minced.
1 tbsp peanut oil
1 red onion, chopped fine
3 cloves garlic, minced or grated
Heat oil and saute onion and garlic until soft and fragrant
1 tbsp tomato paste
salt to taste
2 tsp fresh garam masala powder
1/2 cup frozen peas, thawed
Add to the pot, incorporate the paste and cook till aroma exudes. Add the reserved 'kheema'.
1/2 cup waterAdd water and simmer for 5-7 minutes


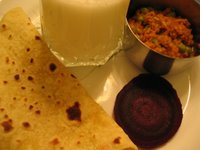
This is a great way to add soy to your diet. Thanks Bilbo, for the recipe. Serve hot with warm chappatis, a salad and butter milk.

A Balanced Meal

Doodhi Aur Jowar ki Masala Roti

Jowar aka sorghum is a gluten free, wheat free whole grain. I was blissfully unaware of the existence of this grain until MIL came into the picture. I instantly liked the bhakris (rotis that are rolled by patting), warm off the tawa with ghee and garlic chutney. The texture of the bhakri was unlike anything I had tasted before. Because the jowar flour is gluten free, it is difficult to roll out and breaks easily. One tip MIL graciously shared with me, is to prepare the dough with hot water. Add hot water to dough while stiring around with a spoon and when it forms the consistency of scrambled eggs, use both hands to form a firm dough. This makes the dough on the stickier side, which makes it easier to roll out. That said, I will be the first to admit that I have great difficulty rolling out the bakri, and end up doing patch work. As a result, the bhakris are not round, nor do they puff up ever so slightly when cooked :-( If you want to take a look at what jowar rotis should look like, you might want to visit Ashwini's Food-for Thought. Edit: Another excellent resource can be found at the Cook's Cottage. Thanks! I feel a renewed zeal to try out the jowar bhakris.

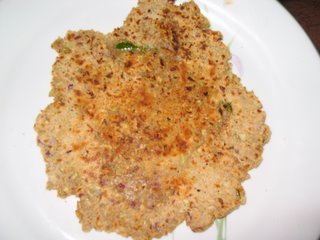
But... No despair, MIL gave me another recipe for masala jowar rotis which is very forgiving. It tastes great - all patched up. It is sorgum roti, stuffed with doodhi or bottlegourd. It is quick, nutritious and best of all - one-dish-meal! No fuss cleanup. This roti is best eaten fresh, smeared with ghee or butter accompanied with garlic chutney and a glass of buttermilk.


Jowar Aur Doodhi (Bottle gourd) ki masala Roti
1 cup bottle gourd peeled and cut into large chunks
3-4 green chilies
3 cloves garlic
1 small red onion, peeled and chunked
Place all ingredients in a food processor and give it a 'whir' until the ingredients are grated. Transfer to a wide mouth mixing bowl
2 cups jowar flour
2-3 tbps sprouted moong or bean sprouts (optional)
1 tbsp coriander powder
salt to taste
Add to the vegetable mixture.
Incorporate into a dough adding hot water only if necessary. Most often the water from the gourd and onion would suffice.
Break dough into 6 lumps, shaping each into a ball.
Use extra dry flour for dusting, and roll out each lump into a thick disc with hands. Carefully remove with a spatula.
Place on a heated tawa, press and cook on both sides till blistered.
Remove from heat and smear with ghee/butter. Serve immediately.

Cooking this roti tends of take its toll on nonstick coated (strongly discouraged for this recipe) or even hard anodized griddles/tava. Use a cast iron griddle if you have one. Or like me, use an old tava saving it exclusively for jowar/bajra rotis.

ARF/5-a-day-Tuesday #6: Marinated Tofu Stir Fry Noodles

Using a variety of veggies and antioxidant rich food is a challenge for me on week nights. But cooking and blogging about them later is a great incentive to eat right for me. So I jumped at Sweetnick's ARF/5-a-day Tuesday event. Albeit 6 weeks late, I hereby join the bandwagon. This week the event is hosted by Stephanie aka The Happy Sorceress. Thanks for hosting ladies!

I never say no to any form of one-dish meal, this week I dabbled with whole wheat noodles. I tried to include soy protiein (tofu) and antioxidant rich, bright colored peppers and carrots. The end product looked and tasted satisfying.

Marinated Tofu and Vegetable Noodles
1 package extra firm silken tofu
4 tbps soya sauce
1 tsp ginger garlic paste
Cut tofu into one inch cubes, place in a shallow baking dish. Add water to cover and stir in soya sauce until amber in color. Add ginger garlic paste. Let tofu marinate for 20 mins. Drain.
2 tbsp oil (preferably dark sesame)
2 garlic cloves minced
1 red onion, cut into thin slices
1 carror julienned
3 green chillies minced or chopped fine
Heat oil in a wide skillet, add the garlic, green chillies, onion and carrot and saute on high heat for 5 minutes.
2 cups green, red and orange bell peppers, cut into strips
1/2 cup button mushrooms, thinly sliced
Add to the stir fry and cook till peppers are slightly crisp.
1 10oz package of dried whole wheat noodlesCook noodles in plenty of salt water, according to package direction. Drain well. Add immediately to stir fry to prevent clumping.
Cook till noodles are heated through. Top with additional soya sauce or hot sauce (sambal)

Tuesday, January 24, 2006

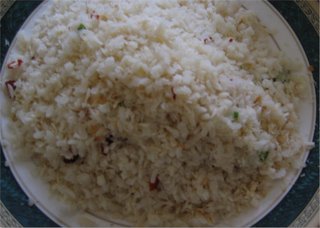
Coconut Poha (Flattened Rice)

Breakfast is a tricky time of day. When I'm rushing out the door, I want to be able to eat something that is super-quick and dirties the least number of dishes. None preferably... but cooking without dirtying dishes is an oxymoron in itself! Most weekday mornings, we eat cold cereal... Cherios, Special K, Honey Bunches of Oats and the likes. I know they are processed and loaded with salt, sugar and what not... but better than most options out there, no? I try to avoid eating packaged cereal bars and granola bars, since most of the commercial chewy ones contain gelatin as part of their 'Natural Flavors'. The most creative I can get on winter mornings, in my cold kitchen is toast some bread and fix us a classic PB&J sandwich.

On the weekends, we usually make it a point to start the day right with some breakfast over hot chai. In fact I get out of bed only when I have a clear picture of whats going to be on for breakfast! I love poha or flattened rice. It's quick, easy and delicious. Now thats not a combination we see that often. Poha can be flavored in many different ways, anything you put in an upma (oh no not that again) can be used in poha. Buy thick flattened rice for this as they tend to be plumper and not fall apart. To prep poha, rinse it under running water in a colander making sure all the grains are moistened. Then allow to drain.


Coconut Poha
2 cups thick poha or flattened rice
salt to taste
Rinse poha, allow to drain. Add salt, toss and set aside
2 tsp oil
1 tsp mustard seeds
1 tsp black gram dal (soaked in water for 2 mins and drained)
3 dried red chillies
3 green chillies minced or chopped fine
Heat oil in a skillet, add the other ingredients, allow to sputter.
3/4 cup grated coconut (thawed if frozen)Add and fry till coconut turns a reddish brown
Add poha and cook till dry

Enjoy with a steaming cup of tea. If you don't have poha, you can also substitute cooked rice. Just increase the amount of coconut and you'll have coconut rice.

Coconut Poha - my entry to From my rasoi breakfast event hosted by Meena of Hooked on Heat.

Monday, January 09, 2006

Comfort Food South Indian style

Even though I have acquired tastes for different types of cuisines and love food in general, I enjoy South Indian food in my own way. Infact according to hubbie, I eat Southie food with the occasional trademark slurp ( Don't be alarmed, I absolutely don't). But, I agree to the extent that I really savour the taste. I made a modest but extremly heartly meal of Vatral Kuzhumbu, Vazhakkai (plantain) curry, Lemon rasam, plain rice, curd rice to extinguish the flames and salad.

Vatral Kuzhumbu

Every family has their own take on this. Here is one from food blogosphere's Shammi.
Here is how it is made in the old GM house.


Vatral Kuzhumbu


2 ladles oilHeat
1 tsp mustad seeds
1/4 tsp methi seeds
2-3 dried red chillies
Add to oil and crackle
1 cup sliced onion
3 tsp sambar powder
2 tsp rasam powder
Add to oil and fry till fragrance exudes
1 lime sized tamarindExtract 3 cups of juice and add
2 tsp saltAdd
Boil for 15-20 mins or thick consistency

Traditionally as Shammi points out, you use dried goodies (Vatral) that you can get from the Indian stores. In their absence, you can use other vegetables (like I have) onions, brinjal, beans, okra etc, and fry them well in the cooking process. Also, keep in mind that the spices must also cook well until the raw smell is gone. In my opinion, the simplest and best accompaniment to this Kuzhumbu is simple potatoes cooked till crispy in simple seasonings like salt and turmeric. Also, Spinach is another classic accompaniment.

I however decided to cook potato's cousin brother, the plantain.


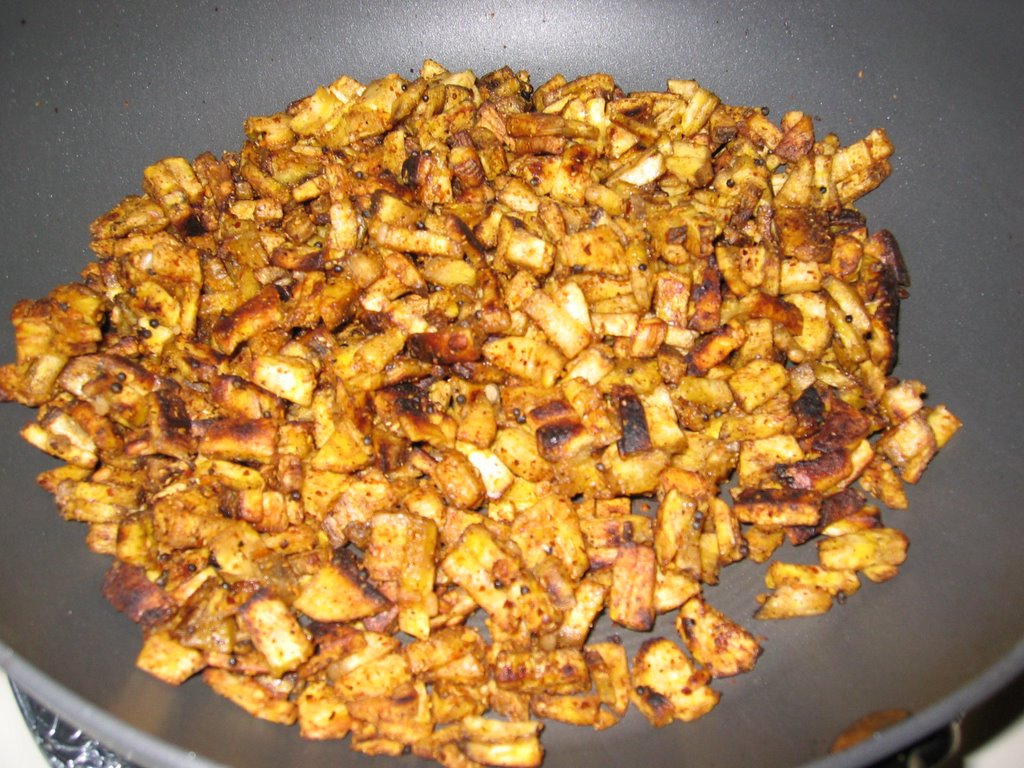
Vazhakkai (Plantain) Curry
3 plantainsPeel, wash and chop into even bite size pieces
2 tbps oil
1 tsp mustard seeds
1 tsp urad dal
Heat oil and crackle seeds. Add chopped plantains
2 tsp salt
pinch asafetida
Scald the plantains. Cook undisturbed for 10 mins
2 tsp curry powder or sambar powderWhen slight browning occurs, add curry powder. Cook uncovered for 5 -10 mins more till desired crispiness obtained

As a wise one has rightly said "Self Restraint solves all problems". I tried to practice it, and didnot harass the veggies, just let them cook in peace, and the results as promised were great.

Lemon (Juicy) Rasam

I love rasam. What a tangy and nutritious meal it makes. There are different types of rasam... my absolute fav is lemon rasam. Apparently when I was young (er), I coined the term 'juicy' rasam meaning lemon rasam. But my suspicion is that Mommie came up with this term, she is always making up cute names to make things sound appetizing. Rasams are also the easiest things in the world to make! Throw in the ingredients, and let the heat do the job. The only smarts needed is NEVER let the rasam boil. It must gently froth just below boiling point.


Lemon Rasam
5 cups water
4-5 green chillies slit
1 tsp turmeric powder
2 tsp salt
2 tsp rasam powder
big pinch asafotida
1 tomato chopped roughly
Add to stockpot/vessel on medium heat.
1.5 cups cooked toor dalWhen rasam begins to froth, add dal. Let the mixture bubble and froth
juice of 1 lemonAdd
1 tsp oil
1 tsp mustard seeds
Add tempering to rasam


There you go. Don't forget to enjoy a nice helping of curd rice at the end of this meal. Here is a great recipe for curd rice by Raji of My Cuisine.

Tuesday, January 03, 2006

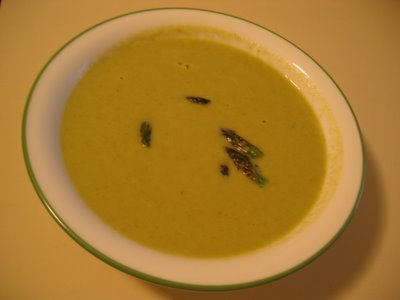
Cream of asparagus soup

Asparagus is one of those 'rich' vegetables that tastes simply great just steamed and topped with melted butter. It has traditionally not been included in Indian dishes, but I would love to know if some one has tried. Here is something we always make whenever aparagus is available in our refrigerator.

Asparagus Soup
Serves 4

Ingredients

1 lb young asparagus
3 tbsp butter
1 small yellow onion roughly chopped
1 tbsp all-purpose flour
2.5 cups vegetable stock or water
1 tbsp lemon juice
1 cup milk
1/2 cup light cream (I substituted 1 mashed ripe avocado... for a mild avocado taste but the same creamy texture)
salt and freshly ground pepper

How to proceed

1. Cut 1.5 inches off the tops of half the asparagus and set aside for a garnish. Slice the remaining asparagus.

2. Melt 2 tbsps of the butter in a large sauce pan and saute the sliced onion for 2-3 minutes until soft.

3. Add the asparagus and saute over low heat for 1 minute.

4. Stir in the flour and cook for 1 minute. Stir in the stock or water and lemon juice, and season with salt and pepper. Bring to a boil, half-cover the pan, then simmer for 15-20 minutes until the asparagus is very tender. (If crazy enough to use the avocado, mash and add at this point)

5. Cool slightly and then process the soup in a food processor or blender until smooth. (You may then press the pureed asparagus through a sieve. I usually skip it as I don't mind some texture)

6. Add milk to the mixture and heat gently for 3-4 minutes.

7. Melt remaining butter and saute the reserved asparagus tips gently for 3-4 minutes to soften. Add to the soup as garnish.

This recipe is adapted from the book "Vegetarian - the best ever recipe collection" by Linda Fraser. Give it a try, I assure you that you will not be dissappointed!


For those of you who have been following my tryst with the avocado, it is finally over! I have used up all those avocados in a variety of ways. The most successful ones are mentioned on this blog :)

Wednesday, December 28, 2005

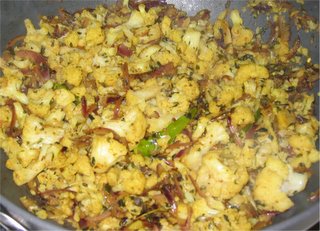
Winter Cauliflower Subzi

Growing up in North India, the fresh vegetable choices in the winter were reduced to mostly cauliflower, peas and the 'ever-blossoming' potatoes. Atleast this was the scene at at our local 'Munna' grocer's store. Come weekend, Mommie would instruct Daddie to get the freshest veggies from Munna and we would sometimes tag along with him with our handy-dandy baskets/shopping bags. Invariably, we came home cauliflower among other things. Throughout the winter, would have had different combinations of cauliflower, peas and potato curries!! Every parent in this world has tried to coax their child to eat cauliflower just because they look like 'trees'. This has worked on majority kids atleast when they are naive. (except some like Hubbie). But I think I have developed a taste for this flowery vegetable which represents 'childhood winter' for me!

Here is how I like to make them

Ingredients

1 small head of a cauliflower (yielding 2 cups of florets)
1 med red onion sliced
3 green chillies slit
3 cloves of garlis sliced
2 tsp jeera powder
2 tsp dhania powder
1/2 tsp amchur powder
2 tsp oil
salt to taste

How to proceed

1. Break the flower into bite size florets, rinse under flowing water. Toss with salt and steam cook for 4-5 mins (almost cooked, not tender... whats the word.. al dente). I usually place a steel (heat resistant) bowl contaning the florets in an electric rice cooker containing 1/2 cup water and turn it off after 5 mins.

2. Heat oil in a pan, add sliced garlic, green chillies and onions and saute until onions are soft. Add spices, and fry for a few seconds. Add the steamed florets and saute until mostly dry.

Serve with warm chappatis, leftovers can be sandwiched for next day's lunch.

I like to steam the florets to reduce the cooking time... they steam while I prep the other ingredients and 5 mins later... done.

This is my entry to the "From my Rasoi - winter" event hosted by the effervescent Meenakshi of Hooked On Heat.

Popover for some tea?

Hope everybody is relaxing and enjoying the holidays. I know I am! After a long time, I spent my afternoons in the kitchen, whipping up stuff I always wanted to try.

On our trip to Maine this past summer, we had wonderful ‘popovers’ after a a long hike at the Acadia National Park. This cosy little teahouse called ‘The Jordan Pond House’ is located right in the middle of the park exactly where most visitors are likely to end up tired and hungry. The location was picture perfect, weather was great and we were served hot tea and wonderfully warm, fresh out the oven popovers with strawberry jam. I can almost still taste it!!

What makes popovers intersting is that they rise without any baking powder, soda or yeast. When you split them apart, they are almost hollow in the center. They rise mainly due to the steam generated by the high water content of the recipe, and the eggs hold them together. They are surpisingly easy to make... Only 5 ingredients!! You would ideally need a popover pan, which looks like a muffin pan BUT each cup is completely separated from others on all four sides. I used a muffin pan but just filled out the four corner cups since I was only serving two people.

Here is my rendition of popovers... not quite like the one we had in Maine... but close enough to keep us satisfied until we visit again.

Ingredients:
(Makes 4)

1 cup unbleached all purpose flour
1 cup milk
2 eggs
1 tsp salt
3 tbsps melted butter

How to proceed

1. To a blender jar, add flour, milk, salt and eggs and blend together. Scrape the sides to ensure all dry flour is incorporated.
2. Pour into individual popover cups. If using a muffin pan, fill only the corner cups 2/3 full.
3. Bake in a 425 degree (F) oven for about 20 - 30 mins.

More tea any one?

Monday, December 19, 2005

Oh Mr. Kringle... It's soon gonna Jingle!!

It's that time of the year again! Finals, vacations, overdose of the red and green colors. I still feel deprived of the festive feeling of Diwali, since I have been preoccupied ('busy') ever since November. Now that I feel at ease, I decided to cook up some festive feeling this 'Holiday' and started out with baking a cake for Hubbie's colleagues at work.

This DRY FRUIT CAKE reciepe is courtesy of my friend 'Khatti Imli' is simple yet sinful. It is a cake with just the right amount of sweetness and crunch. Most of the ingredients may already be in your pantry, so you can just get to work when you feel like cake:-)

DRY FRUIT CAKE

Ingredients

2 Sticks butter
1 can sweetened condensed milk
1 tsp vanilla extract
1 tsp baking soda
1 tsp baking powder
1 tsp ground cinnamon

2 cups flour
1 cup raisins
1 cup desiccated coconut (Optional - I always leave this one out :))
1/2 cup walnuts (blended or pieces)
1/2 cup unsalted almonds (blended or pieces)
1/2 cup orange juice

How to proceed

1. Preheat oven to 350 degrees
2. Mix together the first 6 ingredients in microwaveable bowl and microwave for 3.5 minutes on high. Good idea to do 2 mins and 1.5 min batches and watch the bowl so that the contents don't oveflow. It is a sticky mess to clean.
3. Mix batter with spatula until smooth
4. Add flour a little at a time (to avoid lumps) and mix well until batter is smooth and has no lumps.
5. Add raisins, coconut, chopped nuts, orange juice and again mix well. The batter should now run smooth when dripped from the spoon.
6. If the batter appears lumpy, fill 1/2 the empty can on condensed milk with hot water and gradually pour into the batter while mixing.
7. Grease a 9x12 baking pan and pout batter in the pan and garnish with any nuts and raisins.
8. Bake for 35 - 40 minutes at 350 degree F.

Some observations and tips
1. Do not leave the batter of butter and condensed milk after warming... add the other dry ingredients immediately. Keep all the ingredients at hand before starting the recipe.

The smell of the melting butter and the cake baking is truly intoxicating :)

Friday, December 09, 2005

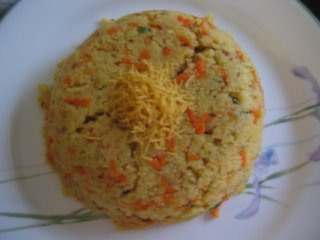
Cracked Wheat Upma

Upma was one of my least favorite things to eat growing up. Poor Mommie tried everything she could to make it look and sound appetizing. For some time, the word upma was taboo at home... Mommie insisted on calling it 'khichdi'. Still, when we put the spoon to our mouths, we would know it was no khichdi, but upma in disguise.

Now when I am far from all things home, upma has made an ironic come back in my life. I end up making upma once in a while simply because it is easy, quick and filling. The irony of it all is that Hubbie is not so fond of upma either :-) He scrunches his nose at the sound of it. But after reading this entry on Mahanandi about Cracked Wheat Upma, I decided that it sounded too nutritious to pass off just because of its 'taste' :-) The only change to the recipe I made was in the use of vegetables in my fridge. Also, in addition to water, I added a cube of frozen V8 vegetable juice that I keep in the freezer. (Pour V8 juice into ice trays, freeze, once set, transfer them into a freezer safe zip lock baggie. One or two cubes into a gravy vegetable is a great substitute... especially when you are running short on tomatoes)

I need to work on my pictures... too much shadow on this one... but the upma was great!!

So the moral of this discussion is that if your son/daughter is being too picky or finicky about food, just send them out into the big bad world to fend for themselves... Then they will learn to appreciate the goodness of home cooked food :-)

Sunday, December 04, 2005

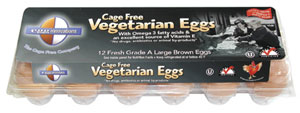
Vegetarian Eggs?


This week at the supermarket, my eyes fell on Cage free 'Vegetarian Eggs'. I am not the keenest of observers, so not sure if it is a new product, but this is the first time I have seen it. More information on the company and which stores carry it can be found here. The gist is that they rear their hens in a 'farm' enviroment rather than a 'factory' environment, their feed is drug and hormone free. In the case of vegetarian eggs, the hens are fed grains and no animal byproducts. A dozen such eggs are priced at $2.99, about 60% more than regular eggs. In my opinion they are worth the extra cost and I can easily afford it by avoiding some of my frivolous expenses like too much coffee each day. After reading Indira's blog on milk, I do hope they reestablish cruelty free milk production soon.

Finally, without sounding too preachy - I hope with some of our support, companies like Egg Innovations can stay in business.

Thursday, December 01, 2005

Avocado Parathas

It's true. You can make parathas of anything if you just put your mind to it.
We bought some avocados from our local wholesale retailer last week, which we have been trying to incorporate into our diet in many ways. We tried them sliced or mashed stuffed in sandwiches, which was a great lunch sandwich. Then the legendary guacomole. But anyone familiar with wholesale shopping wouldnot be surprised to know that we still have plenty of avocados to consume, but we are running out of ideas.

Avocado is actually fruit (like tomato), which is in season in the winter. It was first discovered in Mexico and then taken to the English. It is actually pretty versatile. It is used in salads, soups, breads, appetizers, maincourses even desserts believe it nor not. For more interesting food history of avocados and interesting recipes, visit http://homecooking.about.com/library/weekly/aa012698.htm . You should buy avocados that are fresh, just picked but not ripe. Ripen them at home by keeping them in a brown bag away from direct sunlight and the refridgerator. Ripe avocados are fleshy and yield to touch. Just word about nutrition. Avocados are known to have high fat content, but it is mono saturated, so it is good for you in LIMITED quanity and they say it can control cholesterol. It is said that you can avoid using butter altogether by spreading creamed avovados on your bread. hmmmmm...

So, when I got home last night and looked at the fridge for any quick options and my eyes landed on the avocados. Immediately I ran out and checked if hubbie was in a whacky, i-don't-mind-trying-new-stuff-today mood. So then I set to work...

1 ripe avocado, pitted and fleshed (remove skin like an orange or cut lengthwise and scoop out flesh)
2 cups of chappati flour
1tsp salt (to taste)
1tbs corriander pow
1tbs any other masala you fancy (chaat masala, jeera pow, garam masala etc)
1 tsp chilli pow
water as required (small quantity)

In a large bowl, mash avocado pulp with a fork. Add flour and all masalas. Rub the mixture together and use the moisture of avocado to knead a smooth dough, adding water only if necessary (I needed to add about 2-3 tbsps of water). The dough usually is pretty smooth due to the above stated fat content. Then, break into even sized pieces (about 10). Roll out into ~6 in rounds and slap it on to a hot tava/griddle. It was a weekday dinner, so I didn't spend time folding the rounds over and rolling them again to obtain layers. But I bet you would get nice flaky layers, again due to the above state (good) high fat content. When small bubbles appear, flip and slap the other side on the tava. When that side bubbles up and shows some color, flip again and apply slight pressure with a folded paper napkin or a clean kitchen towel to cook it through. Serve with dal or other vegetable for a complete meal.
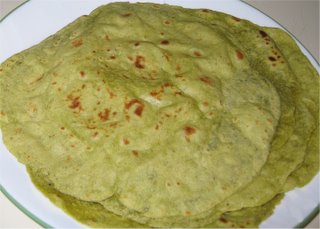

The results, well hubbie didn't complain as much about experimenting on him, so I think they were good. I liked them too :-)

No surprise again, but we still have more avocados remaning, so if you liked this one, stay tuned for more recipes. May be I will try the avocado bread over the weekend. Lets not get our hopes up just yet.

In the mean time, let me know some of your whacky creations...

Saturday, November 26, 2005

Date Cake

Very easy to put together, suitable for surprise entertaining. Even during CHAOS (Cannot Have Anyone Over Syndrome). Also the cake is eggless!!! It doesn't get any better :-)

Date Cake
Ingredients:
12 dates, pitted and chopped
1 1/4 cup milk
3/4 cup oil
3/4 cup powdered sugar
1 cup all-purpose flour
1 tsp. baking soda (not baking powder)
12 walnuts, chopped

To Proceed:
1. Boil the milk in a saucepan. Remove from heat.
2. Add the dates and let it stand until cool.
3. When cool put into a blender or food processor and process or blend until the dates are ground.
4. Add the oil into blender/food processor and blend/process again until incorporated and mixture becomes thick. Add sugar to the mixture in the blender/food processor and blend until incorporated.
5. Transfer mixture to a mixing bowl. Seive flour and baking soda well. Fold in the flour until it is mixed well.
Note: You can at this point add a little more milk in case you find the batter a little thick. The batter should be of pouring consistency like most cake batters.
6. Pour batter into a greased baking dish and bake at 375F for 25 - 30 mins depending on your oven.

We loved this cake and ended up making it twice in one week. I bet you could try this with dried apricots, figs etc for similar results.

As an end note, keep posted for experiments on slow cookers and how slow cooking is/isn't better than regular stove top cooking for Indian cooking.

Monday, November 14, 2005

Oven Fried Banana Chips

The inspiration for this week's cooking experiment came from Tarla Dalal's newsletter(www.tarladalal.com) which sends a bunch of 'new' recipes every 15 days or so. Now at this point, it is important to note that I am biased against Tarla Dalal's recipes. I have unsuccessfully tried following some of her very 'novel' westernized dishes with Indian ingredients. Mrs. Dalal, I like to follow recipies so that I don't have to exercise my noggin, but your 'novel' , 'imaginative' recipes need constant improvisation which makes me doubt if they have been tested. But credit should be given where credit is deserved. Kudos to you for building your own 'empire' and brand name all over the world based on the simple ingredients of vegetarianism. But - call me biased or inexperienced, I would recommend only your strictly Gujarati recipes to friends who are starting out. That said, MIL is a HUGE fan of yours and owns a copy of almost all of your books. One of them is also personally autographed by you.

On to today's topic. So Mrs. Dalal's recipe called for using the microwave oven to crisp the banana chips, but I had my doubts if that would work since microwaves tend to make wet foods soggy at the bottom. So I decided to use the conventional oven instead. One of these days I will try this using the microwave and report the results (which may be just as good)

So,

Ingredients
One Raw Banana (Plaintain)
salt
pepper
jeera pow
(or any other masala that strikes your fancy)
oil a few tsps

How to proceed

Peel the raw banana. This step was the hardest in my case because I own a lousy peeler which took several rounds of peeling to remove all the thick skin. I didnot want to use a knife and loose majority of the pulp. I would like any recommendation on what kind of gadgets would work well for plaintains.

Use a box grater or slicer to slice wafer thin rounds of the plaintain. The thinner the slices are, the faster it will crisp. You HAVE to be careful if you are using a conventional grater for this.

Preheat oven to ~400F. Line a baking sheet with aluminium foil. In a bowl (or a ziploc bag if you don't wont to dirty too many dishes) place the slices, add about 2 tbsps of oil and salt to taste. Toss around to coat both sides of the slices. Place the slices in a single layer on the baking sheet. Use 2 baking sheets if you are making a big batch. Place in oven for 15 mins or till crisp. Flip over the slices once in between.

Once out if the oven and still hot, toss in other dry masalas like jeera pow, chilli pow etc.
Enjoy with rice and dal or rice and sambar or eat it just as is.

Thursday, November 03, 2005

Just for Mommie

I am posting this separately because this one is special. This is the first real recipe I 'shared' with Mommie. The credit to the recipe of 'Rava Dosa' undoubtedly goes to MIL. It is a snap to put together and is a crowd pleaser.

Rava Dosa

2 cups dry roasted rava
1 cup rice flour
2-3 green chillies chopped
1 tsp jeera
pinch of asafoteda
1 tsp of grated coconut (optional)
Water (?? need some algorithm to calculate the amount of water)

Mix all dry ingredients together in a fairly large bowl. Add water until the mixture is very thin, watery (the thinner, the crisper the dosas turn out) . If you leave the batter standing for some time, most of the rava settles at the bottom. Before ladling it out, give it a vigorous stir to make sure all the good stuff from the bottom is incorporated.

Heat tava. After it is nice and hot, pour 1 cup of the thin batter. Drizzle some oil just like you would on a regular dosa. It takes longer to cook and crisp, but you only need to cook only one side. Serve with molagai pudi or any chutnies for a snack or with sambar for a full meal.

Scaling the recipe to 1 cup rava with 1/2 cup rice flour makes just enough dosas for two very hungry people.

Thanks MIL for this instant dosa recipe. Try this one and let me know how it turns out.